

MCP AI — Complete Setup & Usage Guide
Overview
PaperPlus MCP AI is an AI assistant built directly into Autodesk Revit via the Model Context Protocol (MCP). You can chat with AI to query model data, run Revit commands, and get intelligent guidance — without ever leaving Revit.
There are two ways to use it. We recommend the SSE connection method because it works with your own AI client (Claude Desktop, Cursor, VS Code,...) and does not require you to enter any API key into PaperPlus settings. The embedded chat mode requires an API key and may incur costs depending on your provider.
Understanding MCP
The Model Context Protocol (MCP) is an open standard introduced by Anthropic that enables AI models to securely connect with local datasets, tools, and software environments. Just like a USB-C port provides a universal standard to connect various physical devices, MCP serves as a universal digital connector — allowing any AI model to seamlessly "plug into" your workflow and operate software systems on your behalf.
Here is how the ecosystem works under the hood:
- MCP Host: The application where you chat and interact with the AI (e.g., Claude Desktop, Cursor, VS Code, or Windsurf).
- MCP Client: A lightweight connection manager running inside the Host to establish and maintain communication.
- MCP Server: The core integration engine (like the PaperPlus MCP server) that exposes your local environment and software (Revit) to the AI.
- Tools & Resources: Specific capabilities, features, or Revit commands provided by the Server that the AI is explicitly authorized to execute.

Architecture
PaperPlus MCP AI is built in 4 independent layers:
| Layer | Component | Role |
|---|---|---|
| UI | WPF Chat Panel | Chat interface, streams AI response token by token |
| LLM | OpenAI · Gemini · Anthropic · Ollama | AI provider (only needed for embedded mode) |
| MCP Server | McpHttpServer (port 18700–18800) | Lightweight HTTP server handling MCP JSON-RPC and SSE sessions |
| Revit Tools | Revit Tool Registry | Tools that execute real Revit API commands |
⭐ Recommended — Method 1: SSE Connection (No API Key Required)
This is the recommended approach. When you start the MCP Server inside PaperPlus, it opens a local HTTP server on port 18700–18800. You then connect your preferred AI client — Claude Desktop, Cursor, VS Code, or Windsurf — to this server via SSE. Your AI client handles all API key costs. PaperPlus simply provides the Revit tools.
Step 1 — Start the MCP Server
In Revit, go to PaperPlus tab → AI Assistant → Start MCP Server.
Verify the server is running by opening the following URL in your browser:
http://localhost:18700/healthExpected response:
{
  "status": "running",
  "mcp_endpoint": "/mcp",
  "sse_endpoint": "/sse",
  "active_sse_sessions": 0
}
Note: The port is auto-selected from the range 18700–18800. If 18700 is not responding, try 18701, 18702, and so on. To determine the exact port number, open the AI Assistant panel in PaperPlus and click Start — the active port will be displayed there.
Step 2 — Connect Your AI Client
The SSE connection is flexible, so you can connect to any app, IDE, or model, regardless of whether it supports the SSE or HTTP MCP transport type.
Claude Desktop (highly recommended)
Prerequisite: You must install Node.js first. Download it here: Node.js — Run JavaScript Everywhere.
First, download and install Claude Desktop from claude.com/download, then sign in with your account.
Open Settings by pressing Ctrl + ,, navigate to the Developer tab, and click Edit Config. This opens the claude_desktop_config.json file — add the following entry inside "mcpServers":
{
"mcpServers": {
"revit": {
"command": "npx",
"args": [
"-y",
"mcp-remote",
"http://localhost:18700/sse"
]
}
}
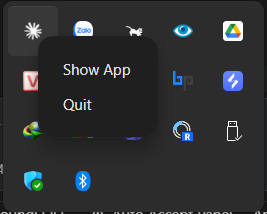
}Fully quit Claude Desktop (do not just close the window — right-click the tray icon and choose Quit), then reopen it. You will see "revit" listed as a connected server.
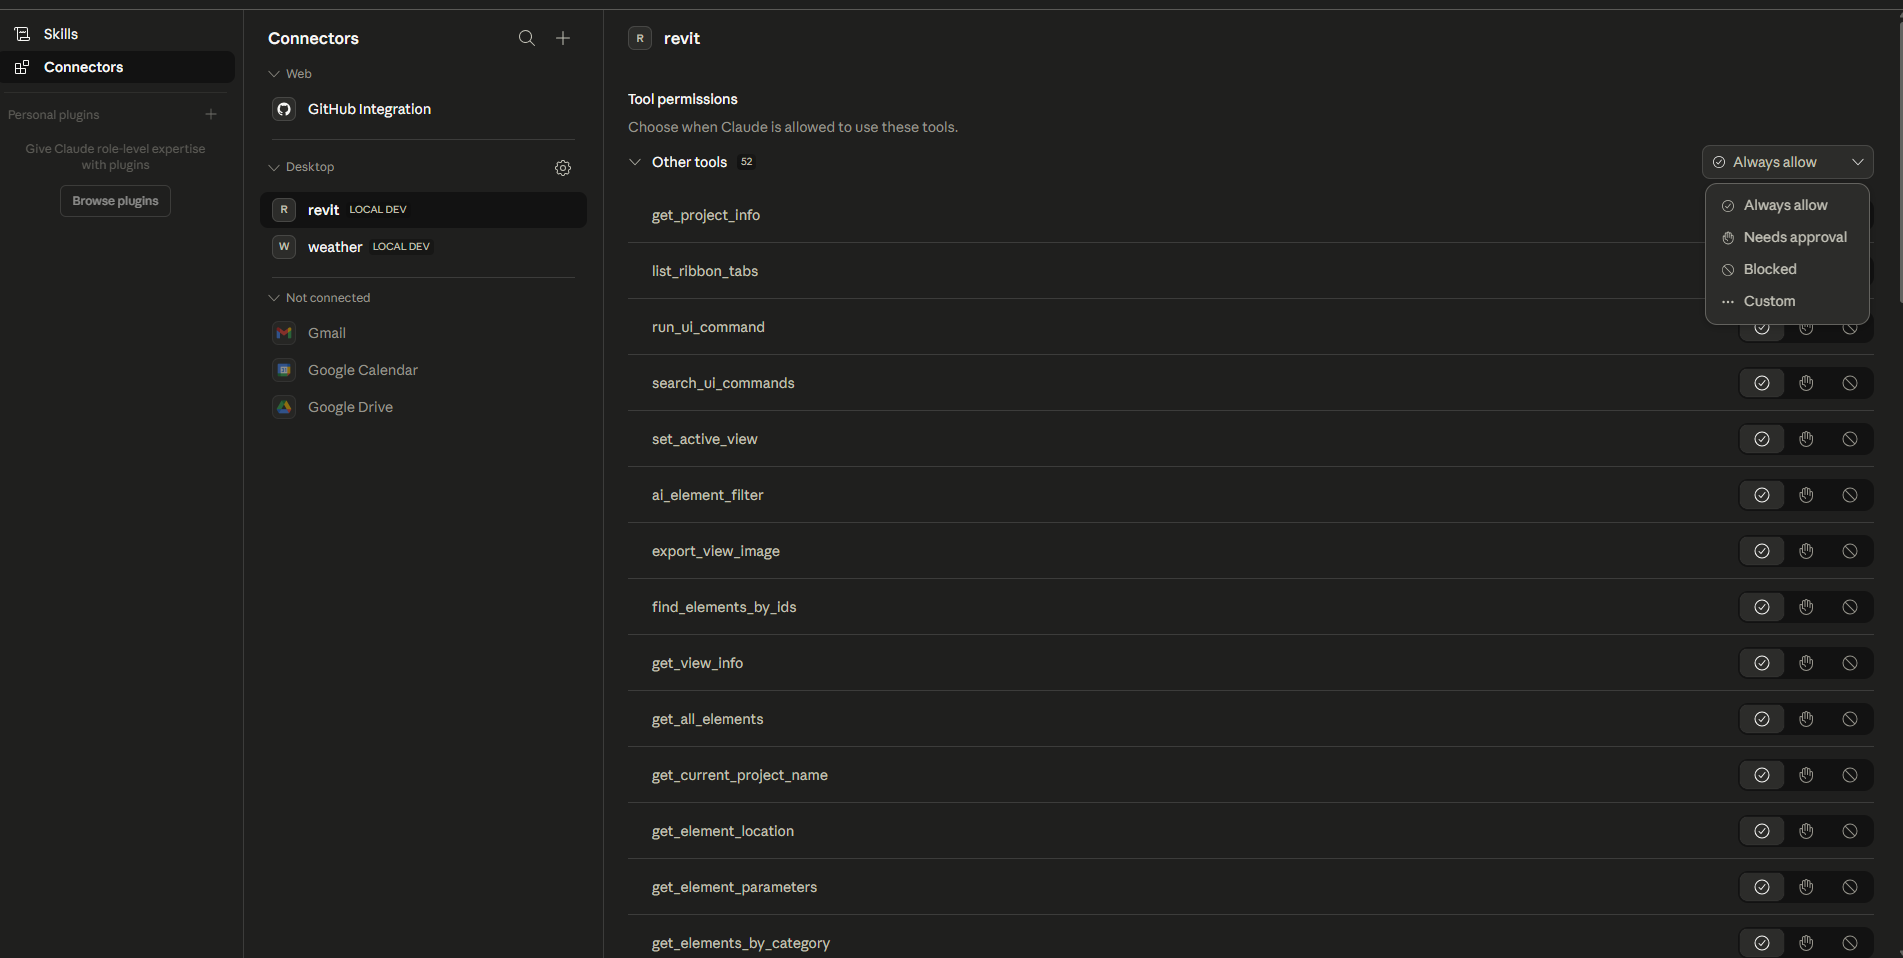
Please be patient for this final step: go to Manage Connectors and set Always Allow for all Revit tools. This prevents approval prompts on every request. Once done, it's ready to use!
Cursor IDE (highly recommended)
Ensure you download it from here: Cursor · Download.
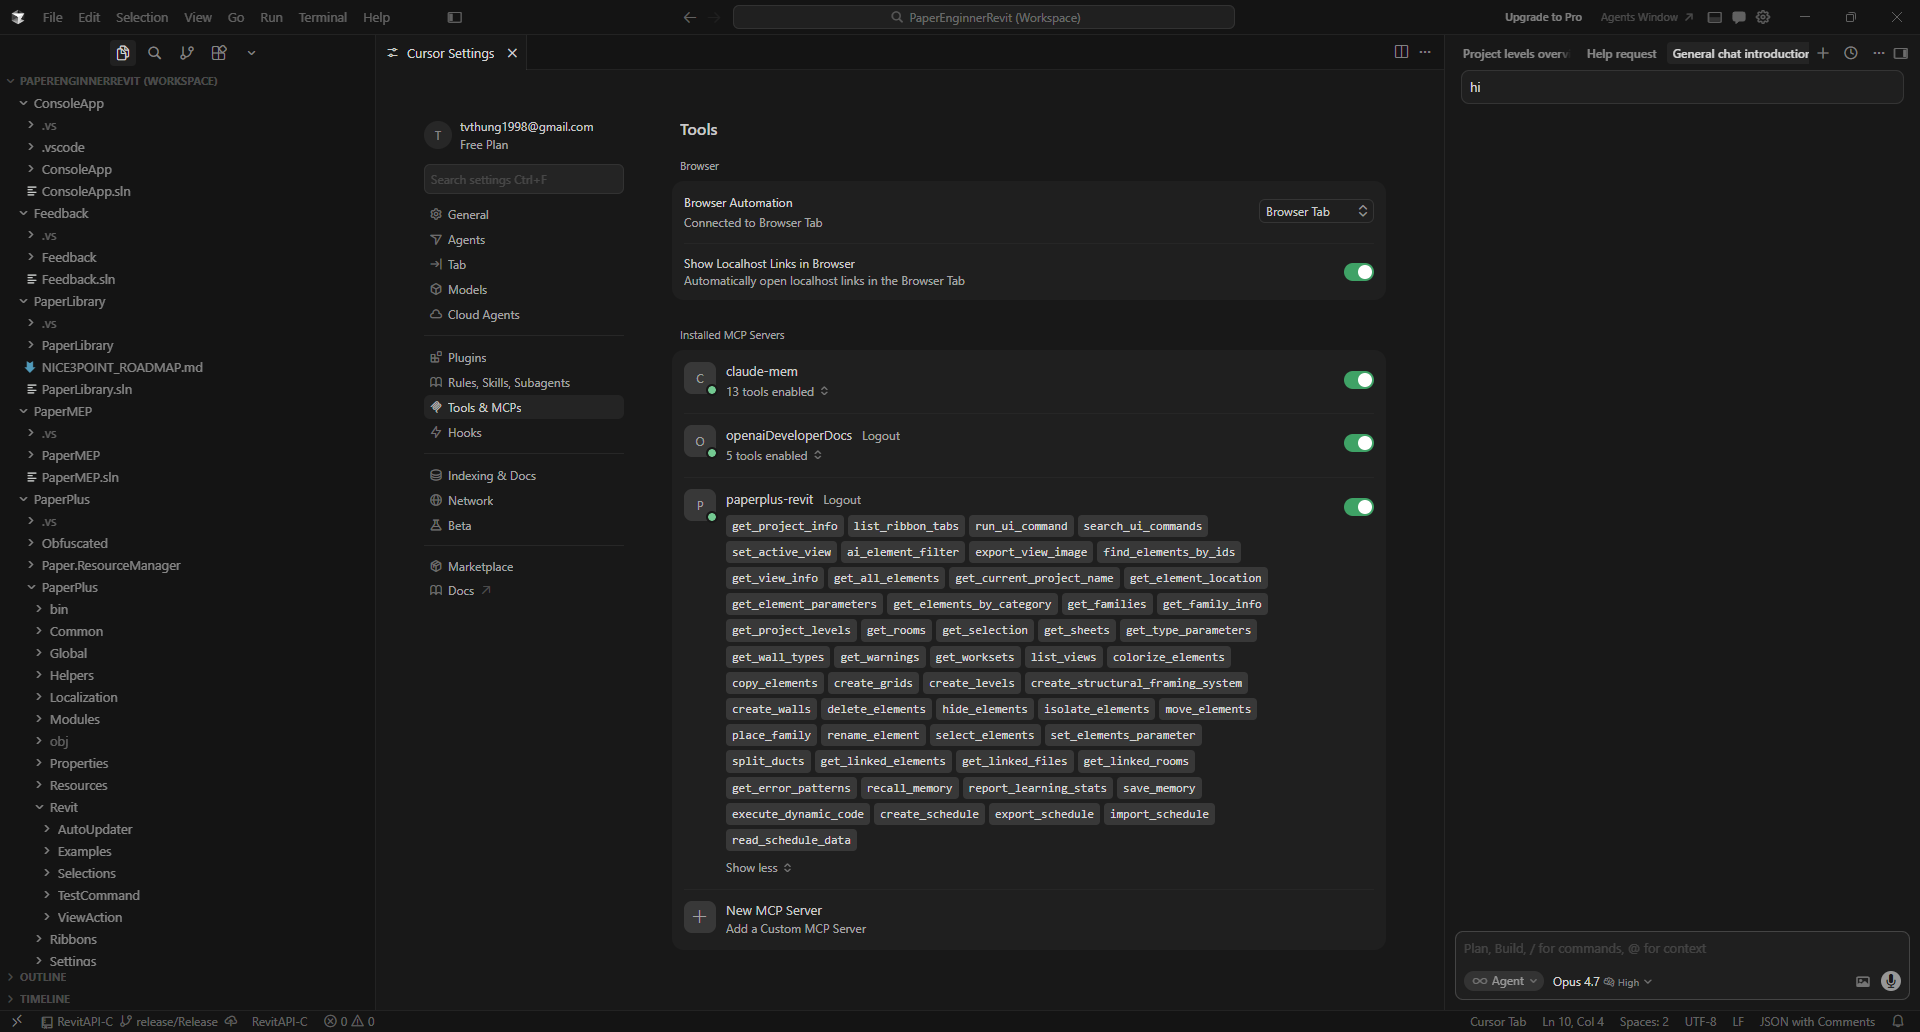
Go to Settings → Tools & MCP, click "New MCP Server", and enter the following configuration:
{
  "paperplus-revit": {
    "url": "http://localhost:18700/sse",
    "transport": "sse"
  }
}
VS Code
Install VS Code first: Download Visual Studio Code - Mac, Linux, Windows.
In the command palette (Ctrl + Shift + P), type >MCP: Add Server...
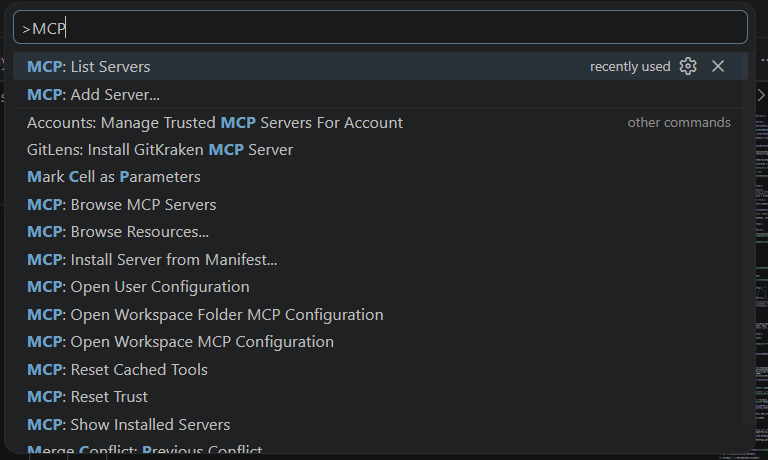
Next, choose HTTP or Server-Sent-Events.

Enter URL: http://localhost:18700/sse
Server ID: paperplus-revit, then choose Global.
Alternatively, you can open %APPDATA%\Code\User\mcp.json and manually add:
{
  "paperplus-revit": {
    "url": "http://localhost:18700/sse",
    "type": "sse"
  }
}
After that, open the command palette again, type >MCP: List Servers..., and enable the MCP server we just added. Please consider that in VS Code, some models may ignore certain MCP tools.
Other IDEs or Models
For other clients, you can follow a similar approach. If you have a high-performance PC, you can even use this method with local models like Ollama.
Method 2: Embedded Chat (Requires API Key)
The embedded chat panel is built directly into Revit. It requires you to supply an AI provider API key in appsettings.json.
Disclaimer: The built-in Revit chat window is currently developed as a simple, basic interface. For a full-featured, robust AI chat experience with better syntax rendering and performance, we strongly recommend using the SSE HTTP connection (Method 1) with dedicated IDEs like Claude Desktop or Cursor.
Note: We have temporarily included a default Groq API key in the configuration for testing purposes. You may use it to try out the system, but we do not recommend relying on it for long-term or production use. If you input your own key, API calls will be billed directly to your provider account.
Edit appsettings.json in the addin folder to customize your connection:
{
  "AiServices": {
    "Provider": "OpenAI",
    "OpenAI": {
      "ApiKey": "YOUR_API_KEY",
      "Model": "llama-3.3-70b-versatile",
      "Endpoint": "https://api.groq.com/openai/v1"
    }
  }
}| Provider | Default Model | Notes |
|---|---|---|
OpenAI |
llama-3.3-70b-versatile | Uses Groq endpoint — free tier available |
Gemini |
gemini-2.5-flash | Google AI Studio API key |
Anthropic |
claude-sonnet-4-6 | Anthropic API key |
Ollama |
mistral | Runs locally — no API key required, no cost |
Open Revit → PaperPlus tab → AI Assistant and start chatting. Available slash commands:
/help             → Show available commands
/tool_list        → List all active Revit tools
/analyze_model    → Analyze the current project
/inspect_element  → Inspect the selected element
Free Alternative: Ollama (Local AI)
Run AI fully offline with no API costs. First, install and start Ollama:
ollama serve
ollama pull mistral
Then update appsettings.json:
{
  "AiServices": {
    "Provider": "Ollama",
    "Ollama": {
      "BaseUrl": "http://localhost:11434/v1",
      "Model": "mistral"
    }
  }
}
Available Revit Tools (50+ Built-in Tools)
Use /tool_list inside the chat panel to see the full live list. Below is the comprehensive list of tools you can use:
| Tool | Type | Description |
|---|---|---|
| 🔍 Query Tools (Safe/Read-only) | ||
| ai_element_filter | Read | Filter elements intelligently using natural language |
| export_view_image | Read | Export current view to an image file |
| find_element_by_ids | Read | Find and inspect elements by their exact Revit ElementId |
| get_active_view_info | Read | Get detailed information about the currently active view |
| get_all_elements | Read | Get a robust list of all instances placed in the project |
| get_current_project_name | Read | Get core project info, file path, view and sheet counts |
| get_element_location | Read | Retrieve geometric location data of elements |
| get_element_parameters | Read | Get all parameters (instance and type) for specific elements |
| get_elements_by_category | Read | List elements belonging to a specific Revit category |
| get_families | Read | Get information about loaded families and their symbols |
| get_family_info | Read | Retrieve deep technical data of a specific family |
| get_levels | Read | Get all levels in the project and their elevations |
| get_project_info | Read | General data from the Project Information category |
| get_rooms | Read | Get all rooms, their areas, numbers, and boundaries |
| get_selection | Read | Get the list of elements currently selected in the Revit UI |
| get_sheets | Read | Get all project sheets with numbers and names |
| get_type_parameters | Read | Get parameters specific to the Type definitions |
| get_wall_types | Read | Retrieve list of available wall types in the project |
| get_warnings | Read | Extract all warnings currently active in the Revit model |
| get_worksets | Read | Retrieve all user-created worksets |
| list_views | Read | Get a structured list of all project views |
| ⚡ Modify Tools (Write/Action Required) | ||
| colorize_elements | Write | Highlight elements in the active view with custom colors |
| copy_elements | Write | Duplicate existing elements |
| create_grids | Write | Create new architectural grids based on coordinates |
| create_levels | Write | Create new levels at specified elevations |
| create_structural_framing_system | Write | Generate framing systems automatically |
| create_walls | Write | Create standard walls between coordinate points |
| delete_elements | Write | Remove elements entirely from the project |
| hide_elements | Write | Hide specific elements in the current view |
| isolate_elements | Write | Temporarily isolate elements in the current view |
| move_elements | Write | Translate elements to a new physical location |
| place_family | Write | Place family instances into the project space |
| rename_element | Write | Rename named elements like views or sheets |
| select_elements | Write | Update the actual selection in the Revit application window |
| set_element_parameter | Write | Modify a single parameter value on an element |
| set_elements_parameter | Write | Batch modify parameter values on multiple elements |
| split_ducts | Write | Split continuing MEP duct runs into smaller segments |
| 📊 Data Extraction Tools | ||
| create_schedule | Write | Programmatically generate a new Revit Schedule |
| export_schedule | Write | Export a schedule's data out of Revit |
| import_schedule | Write | Import schedule views or definitions into the project |
| read_schedule_data | Read | Read tabular data directly from an existing schedule |
| 🔗 Linked Model Tools | ||
| get_linked_elements | Read | Query elements residing inside linked RVT files |
| get_linked_files | Read | Get a list of all Revit links loaded into the current model |
| get_linked_rooms | Read | Retrieve room data hosted within linked models |
| 🖥️ UI & Execution Tools | ||
| list_ribbon_tabs | Read | Get the structure of the Revit Ribbon menu |
| run_ui_command | Write | Programmatically click any tool/command on the Revit Ribbon |
| search_ui_commands | Read | Search for UI commands by name or ID |
| set_active_view | Write | Switch the active document window to a specific view |
| execute_dynamic_code | Write | Allow AI to execute dynamic C# snippets on the fly |
| 🧠 Learning & Memory Tools | ||
| get_error_patterns | Read | Retrieve common structural errors for self-correction |
| recall_memory | Read | Ask the self-learning engine for past contextual data |
| report_learning_stats | Read | Show AI learning and memory accumulation statistics |
| save_memory | Write | Save custom project knowledge or guidelines to long-term memory |
Write tools are only activated when the AI detects action keywords in your message (create, set, rename, delete, colorize…). This prevents the AI from modifying your model unintentionally.
It is best to keep the tool list tightly curated. If you have any suggestions to add, remove, or improve any tool, please let us know!
Important Notes
- Dynamic port: The server picks an available port from 18700–18800. Check
/healthor the AI Assistant panel to confirm the actual port before configuring your IDE. - Localhost only: The server only binds to
127.0.0.1— it is never exposed to your local network. - Revit must be open: All tool calls require Revit to be running with an active document loaded.
- SSE session timeout: Sessions are automatically closed after 120 seconds of inactivity. Your client will reconnect automatically on the next request.
Comments
Please login to post a comment.